Showing posts with label baking. Show all posts

Friday, 20 September 2013

Autumn Cooking #1 - Pear and Blackberry crumble tray bake

Not only do I love Autumn make up , I absolutely love Autumn cooking - I love the way you can whip something up which can warm and comfort the soul(cheesy !.)  With this I thought I'd do 4 weekly posts which feature some of my favourite dishes. 

First up Blackberries , now I personally think at this time of the year you may as well pick you're own ( look below for my top tips for blackberry picking) 

The berries at the front are frozen NOT mouldy haha 

What you will need : 

  • 25g S-R flour
  • 25g unsalted butter
  • 2 tbsp demerara sugar
  • 1 tsp cinnamon
  • 3 tsp ground almonds 
For the sponge :
  • 175g S-R flour
  • 175g unsalted butter
  • 175g demerara sugar 
  • 2tsp cinnamon 
  • 3 eggs 
  • 2tbsp elderflower cordial
  • 200g peeled and chopped pears
  • 200g blackberries(I soaked mine in 2tbsp of amaretto)
  1. Heat the oven to 180C/160C(fan) and grease you're chosen tin
  2. Put flour,butter,sugar,almonds and cinnamon in a bowl and rub together until the mixture resembles bread crumbs. Put this to one side as its the crumble topping. 
  3. For the cake: cream together butter and sugar. 
  4. Add the flour,cinnamon,eggs and elder flower cordial and beat until combined. Gently fold in the pears,blackberries and amaretto into the mixture. 
  5. Pop into the tin and sprinkle with the crumble topping. Bake for 30-35 minutes or until a skewer comes out clean. 
  6. Allow to cool and serve 
Inspired by this recipe


Bridgey's top tips for blackberry picking:
  1. Firstly be careful , blackberries after all do live in brambles and it is not unlikely to find the odd nettle. Longs can be a god send especially as you might have to climb over some brambles.
  2. Secondly if you are planning on picking some blackberries take along a container - in fact maybe just always have a spare in the car or a poo bag at this time of the year. worse comes to worse use a coat pocket (and yes my Barbour jacket now has a lovely blackberry stained pocket) 
  3. Now nobody wants pee flavoured blackberries so don't pick to low to the ground.  On that note make sure you wash you're berries before consumption. 
  4. However you can freeze you're blackberry booty but if you do don't wash them before freezing. 
  5. Finally don't be greedy when picking as the chances are someone will love blackberry picking just as much.
So I do apologise that this was such a long post but honestly these taste amazing especially with a dash of cream or custard. 
Don't wanna miss out on this little series follow feed the sharks on bloglovin


Tuesday, 14 May 2013

When life gives you lemons ... bake a cake?

So initially this blog was meant to be more focused around baking however I just haven't felt like baking recently and find writing about beauty a whole lot easier . However this has all changed be it because of spying all the beautiful pastries in Paris or that I generally have more time to chill in the 'kitch'.
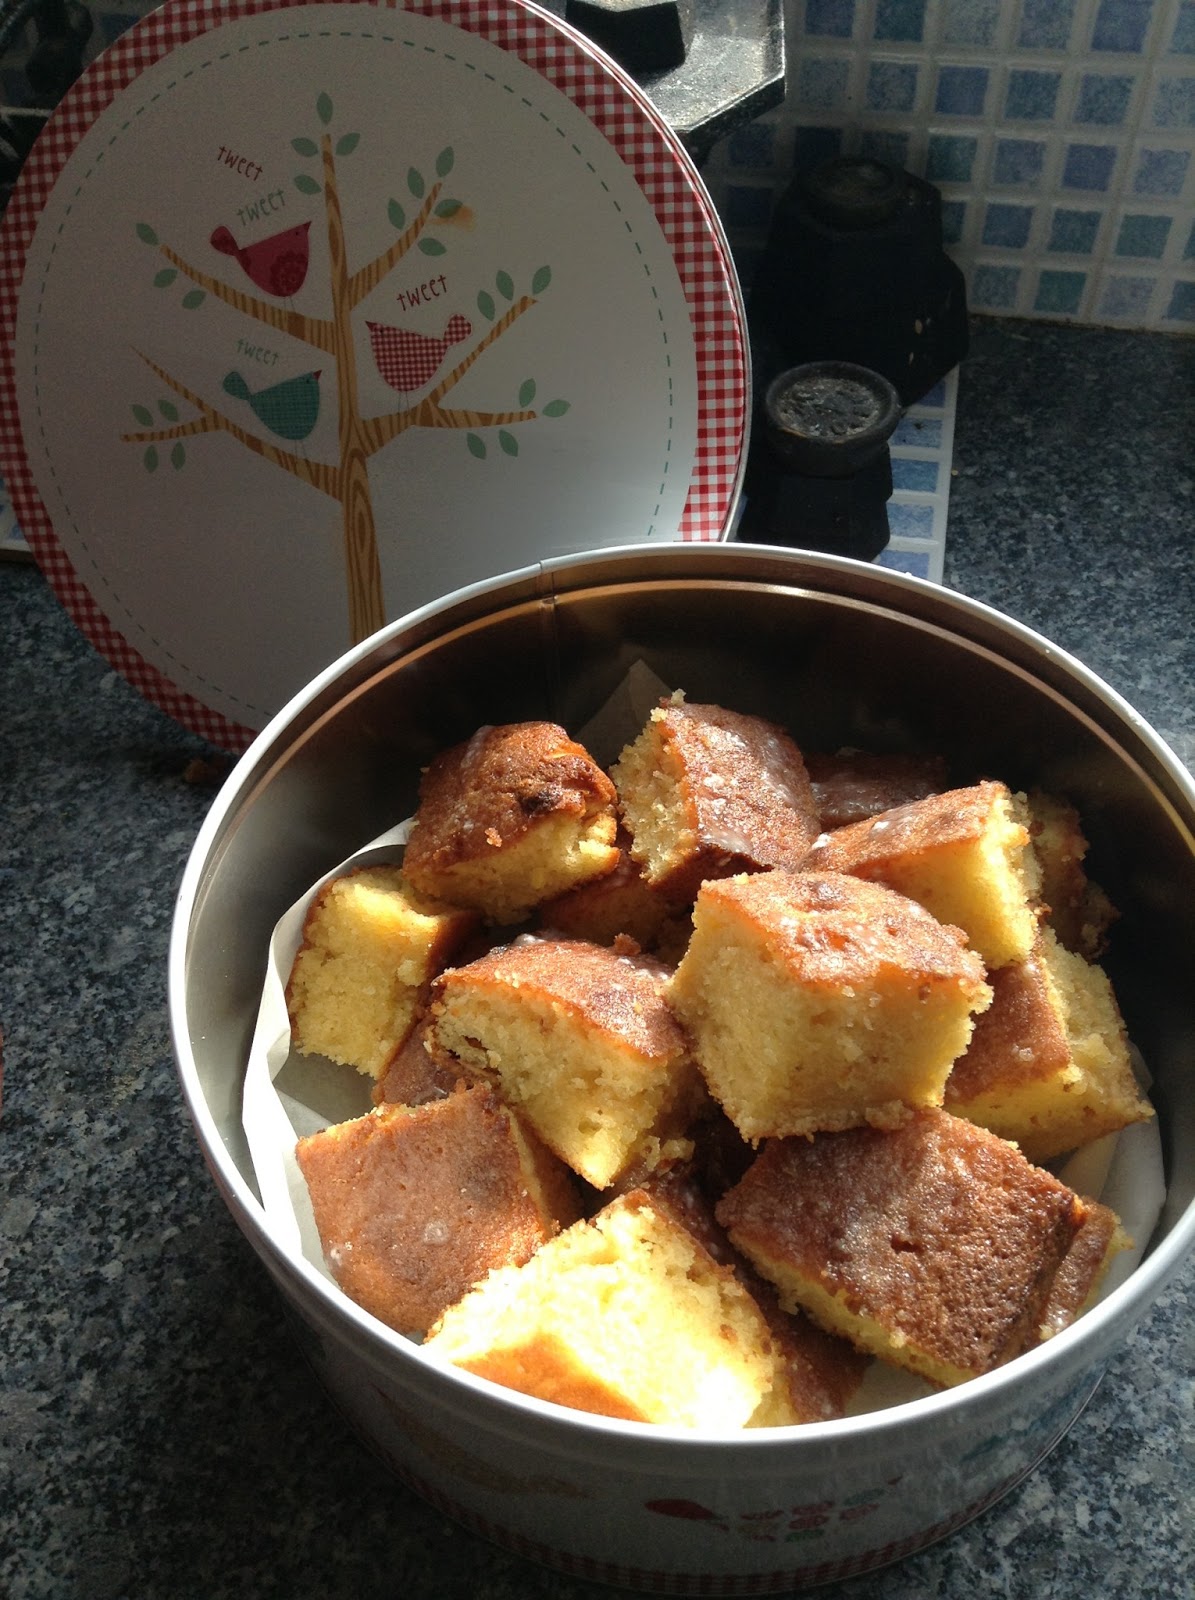
Today after work I decided to bake a lemon and White chocolate tray bake - I warn you now it's not the most glamorous cake nor does it have any fancy decoration but boy does it taste scrummy.


Ingredients:

175g Butter
175g Caster sugar
2 unwaxed lemons 
3 eggs
100 S-R flour
74g ground almonds 
100g demerrea sugar 
90g White Chocolate buttons 


Method:

1) Pre-heat the oven to 180 degrees and grease line a brownie tin ( this is your bake you choose ) . Beat together the butter, caster sugar and the zest of 1 lemon. Keep beating until the mixture is light and fluffy. Add the eggs one by one and beat again. 
2) Fold in the flour , followed by the almonds and the buttons. If you feel the mixture is a little too thick add a touch of milk. Spoon into your chosen tin and pop in the oven for 40 minutes. (until a skewer comes out clean) 
3) Mix the juice off both lemons with the demerara sugar , this will give you a lemon syrup. Remove your cake from the oven and allow to cool slightly. When the cake is still slightly warm poke holes into it and pour over the lemony syrup. 
4) Allow to cool. Cut the cake into bite size pieces and tuck in :) - recommended with a good old cuppa tea


Tuesday, 9 April 2013

The lazy girl's chicken pie

Little  bit of a different post for today in the shape of 'The lazy girl's chicken pie' but it's also suitable for any lazy boys out there. Now i'm not usually a pie fan but I had a craving and fancied doing something a bit different . I will say our pies ended up looking a little rustic but who wants perfect anyway?

Ingredients -  serves 6 
3 Spring onions finely sliced
3 mushrooms finely sliced
400g diced chicken breast
2 tbsp Plain flour
4 tbsp half fat creme fraice
A block of ready roll puff pastry ( for the lazy part)
330ml of chicken stock ( I use knorr stock pots)
3 rashers of bacon
125g sweetcorn
20g Unsalted butter
1 egg

1. Firstly I fried of the chicken and bacon in a little oil until fully cooked. I then popped this mixture into a big bowl. I then fried off the mushrooms,corn and spring onions for 2-3 minutes and added this to the chicken/bacon mix.
2. For the sauce. Put the butter in a saucepan and melt over a low heat. Tip the flour into a pan and mix with the butter to make a thick smooth sauce. Gradually whisk in the stock until the sauce has thickened. Turn down the heat and leave the sauce to boil for a few minutes. Remove from the heat and stir in the creme fraice. Pour the sauce over your filling and spoon the mixture into the dishes or dish your choice.

It may look yuck! but I assure it's really tasty 


3. Unroll the pastry to fit your pie dish . Now you could do this really neatly and make it look pretty BUT this is a lazy chicken pie so just cut the right size and pop it on the top. Once you've done this pop it in the fridge for 15 mins so the pastry can relax ! and you can get a cuppa !
4. Glaze your pastry with a beaten egg and pop in the oven at 190 degrees for 35 minutes.
5. After 35 minutes you pie should have risen somewhat and be golden brown. Leave to cool then enjoy for you dinner with mash and vegetables( if you like) .

I did warn you they were rustic ! 

Thursday, 28 March 2013

A fruity birthday cake :)


So this week was one of my best friends 21st birthday and she decided to do a fruit and veg theme interesting and unique yes? I then decided to make a cake for her , I didn't want to do a fruit cake so instead I did a Victoria sponge with nutella/butter cream filling and decorated with various fruity bits and pieces including chocolate strawberries. 


For the sponge I went with good old Mary Berry who in my eyes can do no wrong she is fantastic. This is the recipe I used which is super duper easy and doesn't require loads of ingredients.  Mary Berry.
I made one teeny edit and that was too use 3 tablespoons of nutella instead of jam for a chocolaty fix.

Buttercream : both for the filling and for decorating the outside 
140g Softened butter
280g Icing sugar
1-2 tbsp milk
few drops of vanilla and a few drops of food colouring. I went for a pale pink .

1. Beat the butter until soft , slowly add icing sugar until smooth.
2.Keep beating until all the icing is combined, add a little milk and mix in your chosen colouring.

Decoration:
100g melted white chocolate
100g melted milk chocolate
A punnet of Strawberrys ( take your time to search for nice ones as strawberries aren't in season and aren't always the best in March .
You simply dip the strawberry's in the chocolate and allow to set.

Lots of fruity themed sweeties I went with gummy cherries and foam banana's . I also made little cherries out of red fondant icing and piped on some green stalks with royal icing.


So there you have it sorry It's all a bit jumbled it took an age to make and I stupidly didn't take notes but I hope you can follow it . Feel free to ask me any questions . Have a lovely Easter weekend.


Wednesday, 27 February 2013

Chocolate Profiteroles

So I finally caved and made profiteroles for my boyfriend and housemates ( I hate them and eclairs). I was a little cautious due to a ball ache last time I made them - bearing in mind this was nearly three years ago for A Level Food tech. The main reason they can be so difficult is that they take up a lot of time , pots and pans and everything must be accurately measured.  Armed with Mary Berry and my own twists I accepted the challenge... The Berry would never let me down .

Ingredients:

  • 60g Butter cut into cubes 
  • 150ml of water 
  • 75g Plain flour 
  • 2 eggs lightly beaten 
  • 300ml whipped cream 
  • 2tbsp Icing sugar 
  • 2tsp vanilla extract 
  • 100g Plain chocolate 
  • 200ml double cream 

1)  Put the butter and water in a heavy based pan and heat until the butter melts . Bring to the boil but BE VERY CAREFUL not to melt the butter. 
2) Take the saucepan off the heat and stir in the flour with a bit of force until the mixture makes a dough(this should take 3 mins)
3) Leave to cool slightly (so your eggs don't scramble) then beat your eggs in gradually , beating well with each addition. This should give you a smooth and shiny paste. 
4) Butter a baking tray and sprinkle with water. Pipe twelve balls of pastry on the tray. Bake in a preheated oven at 220°C/gas mark 7 for 10 minutes, then reduce the heat to 190°C/gas mark 5 and bake for 20 minutes. Using a piping bag nozzle poke a small hole in each profiterole. Allow to cool. 
5)  I made a ganache for the topping but there are other recipes available and you can also do coffee profiteroles. To make the Chocolate ganache:   Melt 100g plain chocolate in 200ml Double cream until smooth and shiny. 
6) To make the Chantilly cream filling : whip  300ml of cream with 2tbsp of vanilla extract and 2tsp of icing sugar.
7) Once your profiteroles are fully cooled pipe in the wiped cream in the hole you made previously and dip your profiterole in the chocolate ganache . YUMMY! 
8) Allow the chocolate to harden. 
9) Place into your mouth and enjoy !!!!

So although I'm sure no french Patisserie will be snapping be up just yet I must say I was rather pleased and these were certainly a step up from the last time. I have also been assured they taste pretty fine too. 

ENJOY !!!

Friday, 22 February 2013

Just like granny used to make em...

Cheese and Chorizo scones:

Well not exactly how granny would make cheese scones in fact she's probably turning in her grave at the fact I added Chorizo and paprika but essentially this is a recipe that already remind me of my Nana I used to love going to her house and having giant cheese scones... I am even lucky enough to have her hand written cook book with the original recipe.  These are really good for adding other ingredients too and I had some left over Chorizo left so went for a Spanish twist .   

200g S-R flour 
50g Butter 
25g porridge oats
85g Grated Cheddar plus little extra  
50g Finely chopped Chorizo ( use the one that doesn't require cooking)  
1 tsp smoked paprika
150 ml milk 

1. Pre-heat an oven 220 degrees . Put Flour in a large bowl and rub in the butter until it looks like breadcrumbs. Stir in the oats,cheese, chorizo and paprika . Fold in the milk . If you feel the mixture is a little dry you can always add a teeny bit more milk. Then bring together the dough so that it forms a ball. 
2. Tip the dough ball onto a slightly floured surface and roll out no thinner than 2cm. You can then cut the dough I used hearts but you can also use a circular cutter. 
3. Pop them on a baking tray or two , sprinkle with extra cheese and bake for 12-15 minutes until golden. 
4. Allow them to cool and pop them on a plate. However I love them fresh out the oven. 

So hope you enjoyed that little bake either tomorrow or Sunday I am tackling eclairs due to the subtle hinting from my boyfriend and housemates. 
Post will be coming very soon !! 
Have a lovely weekend guys <3

Sunday, 17 February 2013

Choco shortbread hearts

CHOCO SHORTBREAD HEARTS : <3
Ingredients :   
100g unsalted butter 
50g caster sugar
110g plain flour 
40g cocoa powder 
And anything you want to decorate with I used silver spoon's chocolate caramel buttons .... yummy !!


Method : 
1. Preheat the oven to 160 degrees and line 2 flat tins with grease proof paper.  Grab a bowl and add the softened butter and caster sugar. Mix until creamy and fluffy. 
2. Add the flour and cocoa powder to the bowl and use a rubber spoon to mix into the butter mixture.  Do this for a minute or two until it becomes too difficult then use your hands to form a dough ball. 
3. Tip the ball onto a floured worktop and roll out to about 1 cm  thickness. Then go cutter crazy ... I used hearts because it was a valentines present but you can do whatever you fancy. 
4. Place onto the trays( be careful to separate the biscuits as they spread when baked) and pop into the oven. Bake for 20 minutes. Before decorating allow the biscuits to fully cool. 
5. Theres a number of ways to decorate I did some just sprinkled with sugar and then I melted the caramel buttons ( these are a great dupe for the hotel chocolat caramel buttons at a fraction of the price) and dipped some of the biscuits with the caramel.... YUMMY!!! 

This post was inspired by a recipe I saw in ' The Great British bake off - learn to bake' book . 

Sunday, 3 February 2013

#4 Yorkshire pud pud's

Bit of a different baking post today but I was just making some Yorkshires (I did say I love roast dinner didnt I?) and thought hey I'll put that up because although it's a simple enough recipe it requires a few sneaky tips to get the perfect yorkshire pudding ...

140g Plain flour , 4 eggs , 200ml milk and seasoning .... you don't need much I would however suggest a silicone muffin case/tray (as you can see we use ours a LOT!)


1.  Heat the oven to 230 degree/ fan 210 and gas mark 8. Drizle oil into your tin and pop in the oven
TIP #1 get your oil really hot it should bubble when you put mixture in
2. To make your batter tip the flour into a large bowl and beat in the eggs. Slowly add in your milk and whisk so that you have a smooth mixture.
TIP #2 I don't really know why but my mum always told me to leave the mixture to stand for 10 minutes so I do ... I like to think it helps
3. Pour your mixture into the cases (fill it so they go huge :D )
4. Leave them to do there thing for 20-25 minutes in the oven. Eat ASAP .
TIP #3 Once cooked you can then put them in the freezer for up to a month .... you never need to buy those famous brand ones again

Enjoy !!!

Thursday, 31 January 2013

#3 Mint Matchmaker cupcakes


`100g plain flour, 20g cocoa powder, 140g caster sugar 1 1/2 tsp baking powder, a pinch of salt , 40g unsalted butter , 120ml whole milk , 1 egg, 2 tbsp peppermint, 1 tbsp vanilla extract
for the icing 500g icing sugar 250g softened butter 2 tbsp pepper mint 1 tbsp green food coloring and of course mint matchmakers for decoration .


1. Preheat an oven to 170 degrees (325 F- gas 3)
2. Weigh out the dry ingredients and combine in a large mixing bowl and combine using a spoon or hand held whisk .
3. In a separate bowl  whisk  egg , milk, vanilla and peppermint extract  and then slowly pour into the dry mixture each bit at a time.  Make sure everything is Incorporated and smooth.
4.Spoon your mixture into paper cases and bake in your pre-heated oven for 20-25 minutes or until a skewer comes out clean.  Leave your cupcakes to fully cool and make the icing in the meantime.

Icing: 

1.Make sure your butter is softened or it will be difficult to combine.
2. Slowly mix in the icing sugar ( do it slowly or you'll make a white mess everywhere - although pretty not nice to clean )
3. Use a hand held whisk to combine the butter and icing sugar until light and fluffy ( this should take about 5 mins)
4. After about 5 mins add your peppermint essence(your choice how you want it) and some green coloring.
5. Make sure your cakes are fully cool and ice . You can then decorate with matchmakers.

YUMMY . ENJOY .


Monday, 28 January 2013

#1 choc-chip cookies

So first up on baking week is good old choc chip cookie( inspiration from Comic Relief bake off I urge you to I-player it) these are so yummy and gooey inside... beautiful. I did get a little over excited and bought a new cookie cutter then didn't need it ... awkward but I included it in the photo anyway cos I'm bad ass
Ingredients 125g unsalted butter 100g LIGHT muscovado sugar 50g caster sugar 1/2 teaspoon baking powder 1 egg 150g plain flour 150g of your chosen 'filling' I used Choc chips but fudge pieces are also a favourite Ready to bake? 1.Pre-heat your oven to 180 degrees. Put the butter , sugars and vanilla into a large mixing bowl and combine. Make sure everything is scraped in.
2. Add your egg to the butter mixture and carefully combine (you don't want it to split) Then in goes your flour and baking powder and stir until fully combined. 3.Tip your 'filling' and stir that in too . 4. Divide the mixture into little balls( you should get about 12 medium sized balls) and drop onto two lined baking trays. LEAVE PLENTY OF ROOM THEY WILL SPREAD IN THE OVEN 5.Pop them in the oven and bake for 10-15 .

Sunday, 20 January 2013

Fudgey flapjacks

So this is a simple recipe but it's very tasty and good for a quick pick me up or on the go snack. It also gave me a great chance to use up the masses of oats I seem to have aquired ... I do love porridge :) It may not be the healthiest recipe due to the ammount of sugar involved but hey everyone needs a scrummy snack 

Ingredients:                                                                                                
175g Butter 
175g golden syrup 
175g LIGHT muscovado sugar 
350g Porridge oats 
200g fudge pieces

The how to's :  
  • Preheat the oven to 150 degrees, weigh out your ingredients and grease line a 20cm tin 
  • Melt the butter over a low heat, add the sugar and syrup . Melt until the sugar has dissolved and combined. Remove from the heat and stir in your porridge and fudge pieces. 
  • Pack the flapjack mixture into the tin. bake for 30 minutes - longer if you don't want very chewy flapjacks. 
  • Once cooked allow to cool and chop them into small bitesize pieces. 
Hey presto simples :)  Oh the tin is a Emma Bridgewater union jack tin from John Lewis but you can buy them directly off the Bridgewater website http://www.emmabridgewater.co.uk/tin/storage-tins/icat/storagetins/


Sunday, 6 January 2013

Bridgey's red Velvet Cupcakes

I love these cupcakes the colour is just amazing . Today I tried a new butter cream for a change of scenery. I used cocoa and chambord which actually worked really really well together :)  Chambord is one of those things I use for cooking all the time but never actually drink . 

Ingredients :
100g S-R Flour 
15g cocoa powder
1/4 tsp baking powder
115g Softened butter 
115g Caster sugar 
2 eggs
2 tbsp of red colouring  
1 tsp vanilla extract 

For the icing :
250g icing sugar
80g softened butter
2 tbsp of milk 
2 tbsp Chambord 
1 tbsp cocoa powder 


1. Preheat the oven to 180 degrees (350F/gas mark 4) and line a muffin tin with cases . 
2. Soften the butter and cream with the sugar . Then stir in the flour ,eggs and baking powder . In another bowl mix the cocoa , red colouring and vanilla to make a paste then add this to your buttery flourey mix . 
3.Once everything is well combined . Place a tablespoon of mix into your cases and bake for 15 minutes or until a skewer comes out clean. 
4. Whilst the cakes are cooling  get your butter cream ready . Mix the softened butter with the icing sugar until combined. Add the chambord and cocoa and mix until thick - but not to thick that you can't pipe it . 
5. When the cakes are FULLY cool pipe, I decorated with a bit of pink glitter for a bit of well sparkle. 

ENJOY !!!! :)


Just a little side note I picked up this snazzy carrier in Tescos yesterday ... you get the muffin tin and a lid that clips on for easy carrying . I just thought that was a very good invention.  I can't find this one online but Amazon do a very very similar one if not a little more pricey 

Saturday, 22 December 2012

Mince pies

Nothing beats a home made mince pie I like the fact that there not all perfect and this recipe is so so simple and tastes amazeballs if I do say so myself  .... I do cheat a little and use a jar of mincemeat but I like to spice it up a little make it a bit more different :)

Ingredients: 
225g COLD butter, diced                               
350g Plain flour 
100g caster sugar 
280g mincemeat 
50g ground almonds 
1/2 apple finely chopped
1 tbsp brandy  
1 egg beaten 

1)So most people would say to make the pastry by hand and yes I normally would but you know Christmas is a busy busy time so I make use of my food processor it's still by hand yes?  So put your butter , flour and sugar in the processor and process(?) until it forms a ball.  you can either chill this or use it straight away it's really up to you 
2) Preheat the oven to 200 degrees . grease a 12 hole cake tin. Put your mincemeat into a bowl and mix in the brandy,almonds and apple 
3) Roll your pastry flat you will need 12 large circles cut out for the bottoms and 12 smaller for the top . Then all you need to do is press the larger ones into the tin then place a teaspoon of mincemeat into the cases and place the smaller ones on top and brush with egg. 
4) Bake for 20 mins when golden allow to cool in the tin and then when cool pop them out and sprinkle with icing sugar.


Bob's your uncle ,easy peasy , enjoy :)                               

Happy baking 


Thursday, 29 November 2012

Birthday cupcakes :)

So this week was my housemates 21st and I decided to make some cupcakes to celebrate :)
I made Chocolate orange  and vanilla and thought i'd put up the recipes because if I do say so myself they were bloomin tasty .... 

Vanilla cupcakes :  made 12 large 12 mini 
  • 200g caster sugar 
  • 200g Stork 
  • 240g S-R flour 
  • 4 eggs
  • 1 1/2 tsp vanilla extract 
Really simple 1. cream together the sugar and stork until pale ( this should take a minute or two ) 
2. Add all the ingredients and have a mix up of them all until everything is combined. 
3. fill your chosen cake tin
4. put in the oven at 150 for 15 minutes ( check to see if there done by inserting a skewer or knife if it comes out clean there done ) If they aren't done just put them in for a little bit longer . 
5. When they are ready bring them out of the oven and allow to cool 
VOILA !!

Chocolate orange cupcakes: made 12 large 12 mini 
  • 200g S-R flour 
  • 50g cocoa 
  • 300g caster sugar 
  • 80g stork 
  • 250mls of milk
  • 2 eggs
  • 3 tsp orange juice
  • 1/2 a chocolate orange smashed into chocolate chips 
Simply follow the first steps of the vanilla cupcakes but when it comes to the cooking 
1. Bake at 170 degrees for 20-25 minutes .
2. when done allow to cool :)

Butter icing : 
  • 500g icing sugar 
  • 250g Butter 
  • 1tsp vanilla extract 
  • If you want to make the chocolate icing add 50g cocoa powder and 2tsp orange juice 
Cream your butter until pale and soft then slowly add the icing sugar. Mix (I find doing this with a hand mixer is best) add the vanilla when all the icing is combined and mix until soft and fluffy. ( about 5 mins)
For the chocolate when you add the vanilla also add the cocoa and orange juice :)

Happy baking :)